A Proper Guide On How To Do The Splits For Beginners
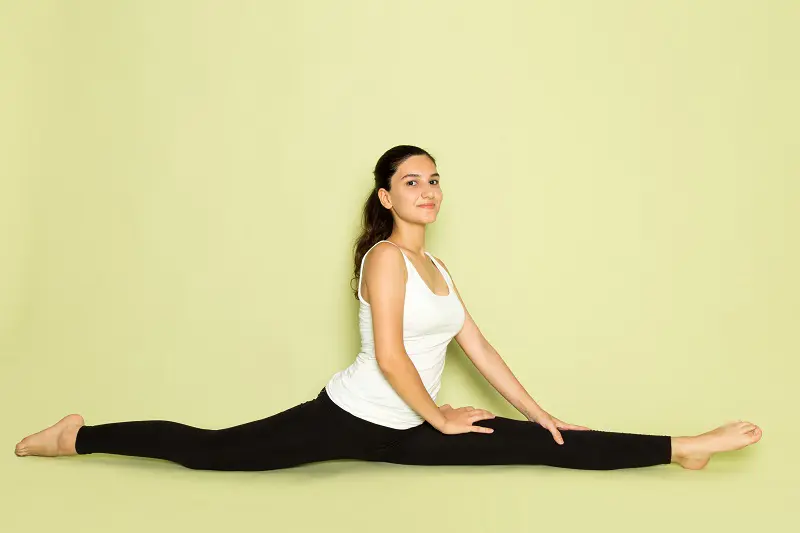
Learning how to do the splits is the ultimate goal for every gymnast and fitness enthusiast. Spreading the legs to a 180-degree angle is a true testament to athletic power and flexibility.
As a beginner, it might feel intimidating at first, but with patience and consistency, it can be achieved within a month. Here are some stretches that can help us work toward doing a split and eventually perfecting it:
Stretches To Do For Splits
Before attempting a full split, our body must be flexible enough to handle it without risking strain or tears in our lower body muscles. A split isn’t just any simple move - it takes consistent practice and dedication to master.
If we are aiming to nail a full split within a week, here are some stretches to practice daily to prepare our body for the big moment:
1. Standing Forward Pose
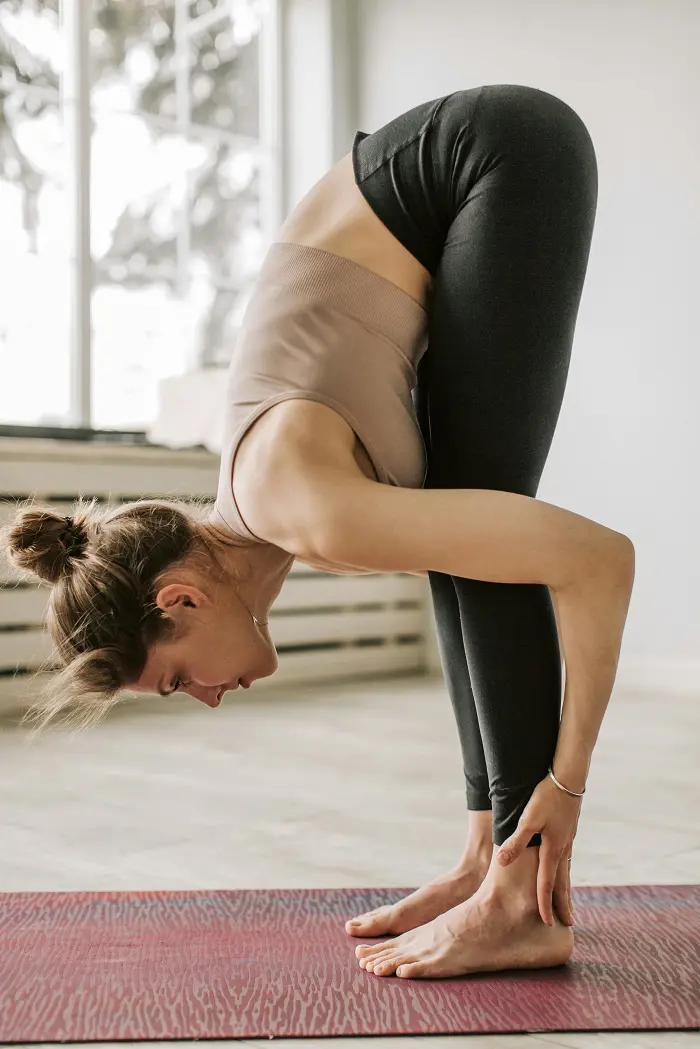
This is one of the best stretches for splits that could help increase the flexibility in hamstring muscles. It also has a calming effect on the nervous system, releasing bodily and mental stress with every bend.
Steps To Do:
- Stand with an upright posture and feet together. The arms must be located at your sides.
- Slowly extend your arms overhead and engage the core muscles.
- Bend the upper body forward, going as low as possible. The lower body must remain stationary.
- Try to touch the legs with your head. If it is not possible, remain in the most comfortable position.
- The hands should be placed on the floor or behind your legs.
- Stay in this bent pose for 30 seconds, feeling the hamstrings stretch.
- Return to the standing position and continue this activity for 5 reps.
2. Kneeling Hip Flexor Stretch
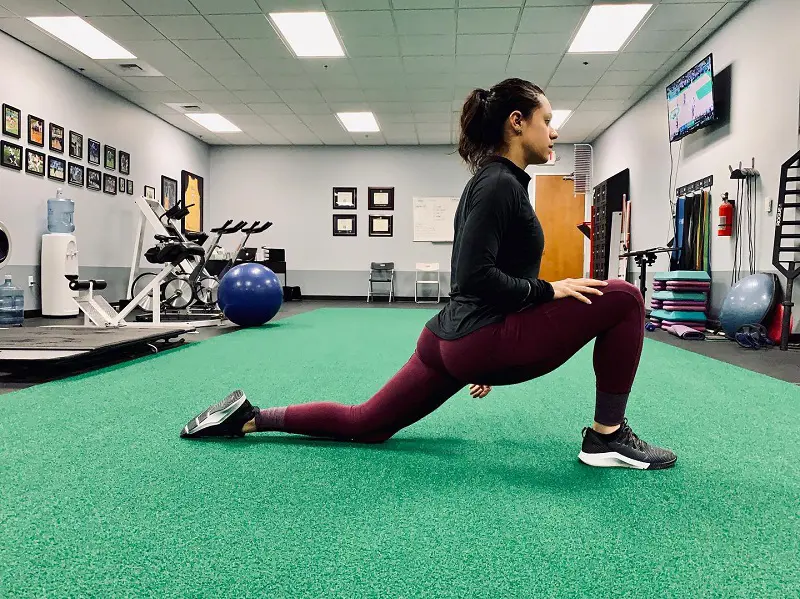
This stretch is a type of lunge and is good for stretching the hip flexor muscles. Consistently performing this workout can enhance hip flexibility, making our job of doing the split much easier.
Remember to keep the pelvis stable while doing this exercise. To get a deeper stretch, hold the arms over your head and lean to the left / right.
Steps To Do:
- Start by getting into a kneeling pose.
- Now, bring the right knee forward. The knee must be bent at a perpendicular angle.
- This forward movement will automatically stretch the left leg.
- Place your hand on the right knee and start pushing the hips forward. Squeeze the glutes while pushing the hips.
- Once you have pushed to the maximum potential, stay in this pose for a few seconds.
- Continue doing this stretch for 5 to 7 reps. Then, switch to the left knee.
3. Butterfly Stretch
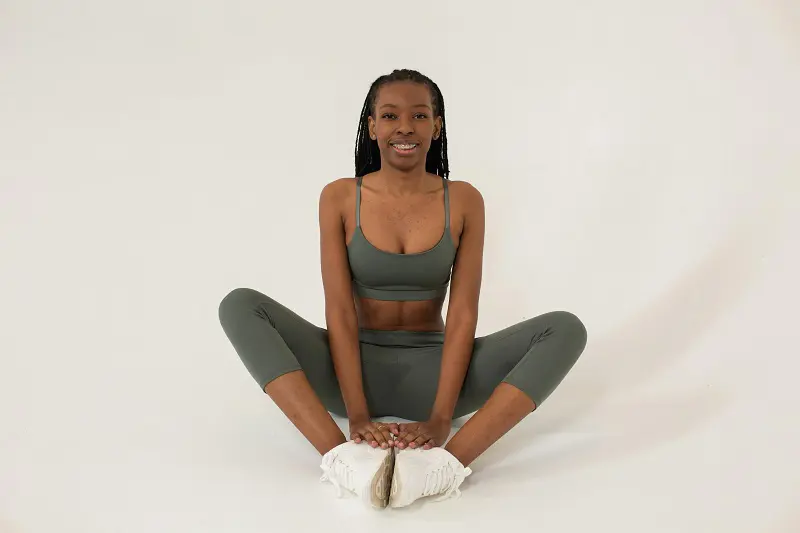
Butterfly stretch is great for loosening up those inner thigh muscles (hip adductors). It’s a fantastic way to boost lower body flexibility and say goodbye to that muscle tightness.
One of the finest stretches to do splits for beginners, it does not put any pressure on the knees, which can be helpful for properly doing the middle split.
Steps To Do:
- Lie down on the floor with a straight back and relaxed shoulders.
- Bring the feet together, bending the knees. The soles must touch each other.
- Hold the feet with both hands.
- Take a deep breath, engage the core, and press the knees to the floor.
- You can press the knees with the help of elbows as well.
- Repeat this process for 10 to 12 reps.
- Practice until you are successful in touching the knees to the floor.
- Once you can touch the ground, then you are going to have an easy time stretching for the splits.
4. Pigeon Pose
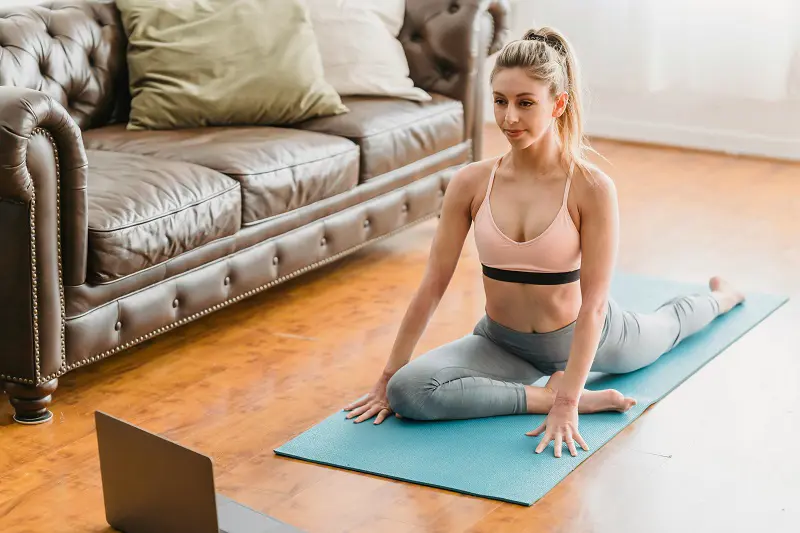
This yoga pose is fantastic for opening the hips and increasing the hip’s range of motion. This could aid the hips in stretching further to perform a perfect split. It also strengthens the glute muscles, reducing the chances of injury when doing the splits.
Pigeon pose is popular in the fitness world, and there are many variations we could try - half pigeon, king pigeon, reclined figure four, and more.
Steps To Do:
- Get into a plank position. The hands and feet should be supporting the entire body weight.
- Bring your left leg forward and bend it once you reach the arms.
- Descend the hips slowly and steadily, feeling a stretch in the thighs, hamstrings, and glutes.
- Place the hands by your sides. The back should be upright during the entire process.
- To increase the intensity, bend the upper body backward.
- Stay in the pigeon pose for 30 seconds, then reverse the move to go back to the plank.
- Continue this exercise for 5 reps, then switch sides.
5. Seated Hamstrings Stretch
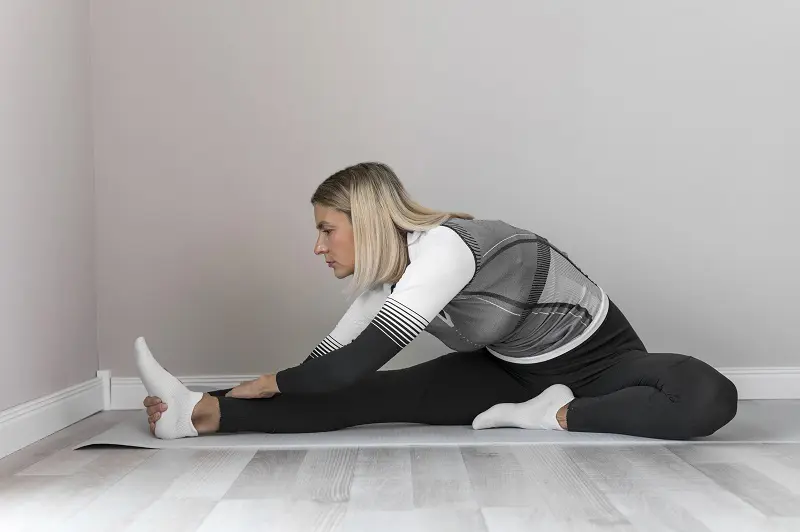
Just like the name implies, this stretch primarily targets the hamstrings and helps loosen them to increase their flexibility. It’s a great way to prepare for building up the power to do a split.
Along with the hamstrings, this stretching exercise also targets glute, adductor, and calf muscles.
Steps To Do:
- Get seated with the right leg stretched in front of you. The toes should be pointed upwards.
- The left leg should be bent and close to your hips, making a figure “4” form.
- Try touching the toes with your right hand. If you are not successful, you could place the hand on your shin.
- Lean the upper body forward, feeling the stretch in the lower body. Do not arch the back too much.
- Hold this pose for a few seconds, then return to original position.
- Practice this stretching exercise for desired number of reps.
6. Pyramid Pose
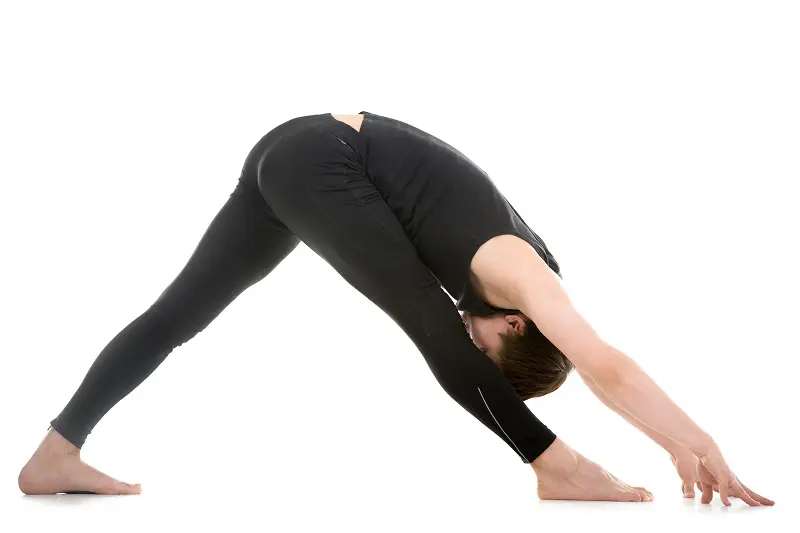
This full body stretch can be utilized to prepare for the splits as it works the hamstrings, quadriceps, and hip muscles. It aids to improve flexibility and balance.
To add challenge, we could perform the pyramid pose with our hands behind our backs, leaning forward with support from only the head. This variation further enhances upper body stability.
Steps To Do:
- Stand tall with the back straight and feet firmly planted on the ground.
- Line the left leg in front of the right leg, maintaining a 30 or 45-degree angle.
- Inhale deeply, and lower the upper body slowly and steadily.
- Both legs should be straight when lowering the body.
- Place your hands on the floor and the head down.
- Hold this pose for 30 seconds to a minute. Don’t shift the hips or arch the back excessively.
- Return to the starting position and repeat the process for 5 to 7 reps. Then, switch the sides.
How To Do A Split?
Practice the aforementioned stretches consistently for a few weeks. Once you feel ready, you can attempt a full split. If your muscles still feel tight when you go partially down, use that point as a progress marker. Restart your stretching routine and come back to it after a week to try again.
There are two types of splits you can work toward. Let’s look at how to perform each one:
1. Front Splits
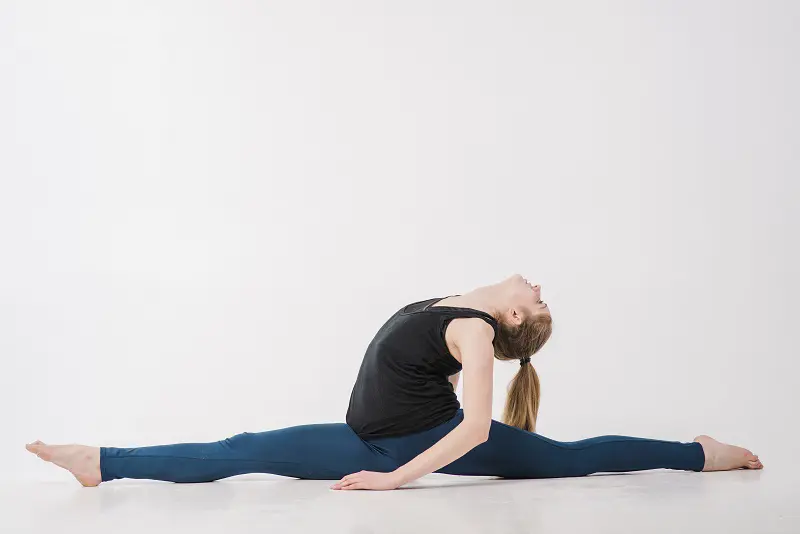
Front splits have us stretching one leg forward and the other back - it’s like the ultimate evolution of a long lunge.
Steps To Do:
- Get into a lunge position. The left knee must be forward, while the right knee should be back.
- Put the arms by your sides. The front foot should be firmly touching the floor.
- Gently start to move the front leg forward. Keep the back leg stationary.
- Continue moving forward until the leg completely becomes straight.
- Then, extend the back leg as well, getting rid of the bend in the knee.
- You could also use your arms for support and balance.
- Breathe in and out while going into the front split pose.
- Stay in this position for 30 seconds, feeling the triumph of successfully doing a front split.
2. Middle Splits
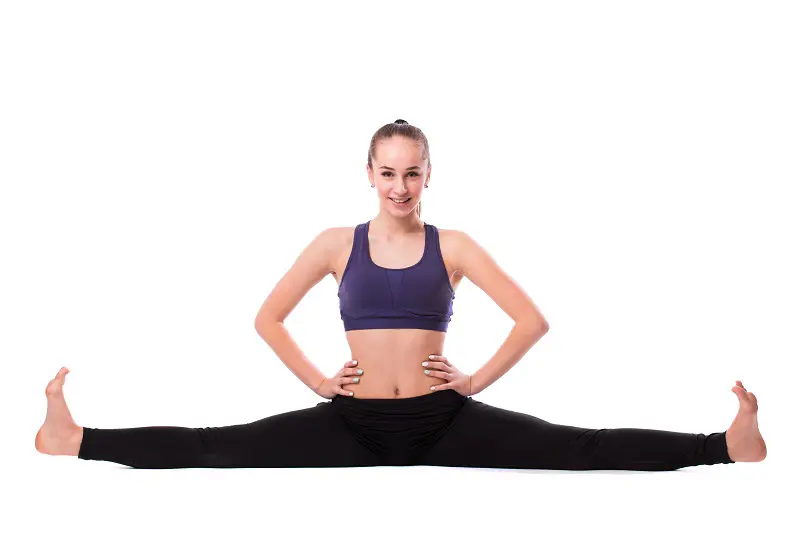
This is the second type of split, where you lower your body through the middle. Take care of your hamstrings, hip flexors, and groin, as over-stretching may lead to serious injuries.
Steps To Do:
- Stand with legs wider than shoulder width apart. The torso should be straight.
- Place the hands in front of you for support and balance.
- With slow, controlled momentum, lower the hips without bending the knees.
- If you face slight difficulty, lean forward while sliding down.
- Once the hips successfully touch the ground with straight legs, you have performed the middle split.
- Continue straightening the legs to achieve that 180-degree perfect look.
- Stay in this pose for 30 seconds.
- For an extra challenge, lean the upper body as far as you can while supporting yourself on your forearms.
Safety Tips And Precautions
Attempting the splits can lead to serious injuries if your lower body isn't strong and flexible enough. Mastering this move takes weeks of practice, and even then, some might struggle due to differences in anatomy.
That’s why it is crucial to follow safety tips and take proper precautions while practicing this stretch. Some of these include:
1. Conduct Proper Warm Ups
Warm up exercises are important to do before jumping into the full split. A split endures a lot of physical stress in the lower body, and any tightness present there could lead to ineffective form or muscle strain.
Warm up with jumping jacks, leg swings, calf raises, and marching-in-place helps loosen tight muscles and shake off the tension.
2. Engage Core Muscles
Core muscles need to be engaged every time you go into a split pose. The core helps stabilize the upper body during the split, ensuring that the lower back does not face injuries.
3. Avoid Overstretching
Not everyone can perform the perfect 180-degree split in a short amount of time. It could take months to reach that level. Don't push yourself to overstretch if you can’t fully extend your legs. Doing so could lead to muscle strain, preventing you from stretching for weeks.
4. Practice With A Partner
If you're a beginner in the fitness world, practicing splits should be done with a partner. They can support your body and help you stretch properly without letting you push too hard. Moreover, a pair of extra eyes can help ensure you're maintaining the correct form.
5. Wear Elastic Clothing
Wear proper clothes that are elastic to make the split workout successful. Yoga pants, athletic shorts, and stretchable leggings are some clothes you can wear while doing the splits. Jeans and other harder fabrics should be avoided.
How Long Can It Take To Do A Split?
Multiple factors can determine the time needed to do a successful split. The major factors are age, starting point, and consistency. Younger people often take less time than older individuals to achieve a full split due to better flexibility and muscle strength.
The starting point also affects how long it takes to do a split. For some, the starting point is already close to the full stretch due to their natural flexibility, while others may struggle even at half that level. People with a starting point closer to the full stretch will reach the end sooner.
Consistency also plays a key role when practicing the split; practicing daily helps you get to the finish line faster than if you practice with large gaps in between.
Benefits Of Learning Splits
Splits are one of the ultimate ways to display your athleticism. Only the most flexible people can do a split perfectly without feeling any pain. Once you've learned how to do them, you can enjoy a lot of health benefits. Here are some of them:
1. Promotes Balance And Coordination
If you can do a proper split, you've likely enhanced your balance and coordination. Your lower body is now more flexible, which helps with stability. This perk is especially useful for older individuals.
2. Increases Range Of Motion
A person who can do a perfect split will have an excellent range of motion. They can perform various activities like twisting, bending, and reaching things with their lower body much easily.
Good mobility in the legs and hips is important for strong performance in runners and dancers.
3. Improves Lower Body Flexibility
Learning how to do split will improve lower body flexibility in the process. Spreading your legs to 180 degrees is no small feat, and achieving that shows a powerful display of flexibility. The tendons loosen up, reducing the risk of muscle stiffness.
Disclaimer: The content presented in this article is only intended to be used for information purposes. It should not be taken as a form of medical / clinical advice.
Recent posts
How To
How To
How To Do Hip Thrusts: Methods, Benefits And Types
The hip thrust is a great bodyweight move for building strong glutes and a solid core. Also called the hip thruster, it’s great for improving posture and easing lower back pain. To get the most out of it, nailing the form is key. Everything fro...
How To
How To Do Bird Dog Exercise? Techniques, Types And Benefits
If we want to enhance core strength and spinal stability, Bird Dog is a fantastic bodyweight exercise to include in any workout routine. It activates various muscle groups like abdominals, glutes, and erector spinae. The movement itself isn’t t...
How To
How To Do Bicep Curls And Develop Stronger Arms
Bicep curl may be the first weight-training exercise we’ll learn during our fitness journey. Sure, it’s about moving a dumbbell up and down, but there’s more to it - it’s a solid strength builder and a great method to define t...
How To
How To Do Lat Pulldown? Methods, Benefits And Types
Doing a lat pulldown is not hard - it's all about maintaining proper momentum and pulling the bar toward our upper chest. This popular exercise is fantastic for engaging our back muscles, particularly the latissimus dorsi. Getting the form right is k...
How To
A Guide On How To Measure Your Waist Correctly
Measuring an individual’s waist is crucial for assessing internal fat deposits that surround the heart. It can indicate a person’s current health status, with a larger waistline suggesting a higher risk of heart disease and stroke. Along ...
How To
Hip Dips: What Are They And How To Get Rid Of?
Hip dips are slight indentations on the outer hips, appearing as small inward curves when viewed from the front. They are usually due to the protrusion in the pelvic structure and are largely determined by genetics. Many women aim for a more rounded ...
