Hip Dips: What Are They And How To Get Rid Of?
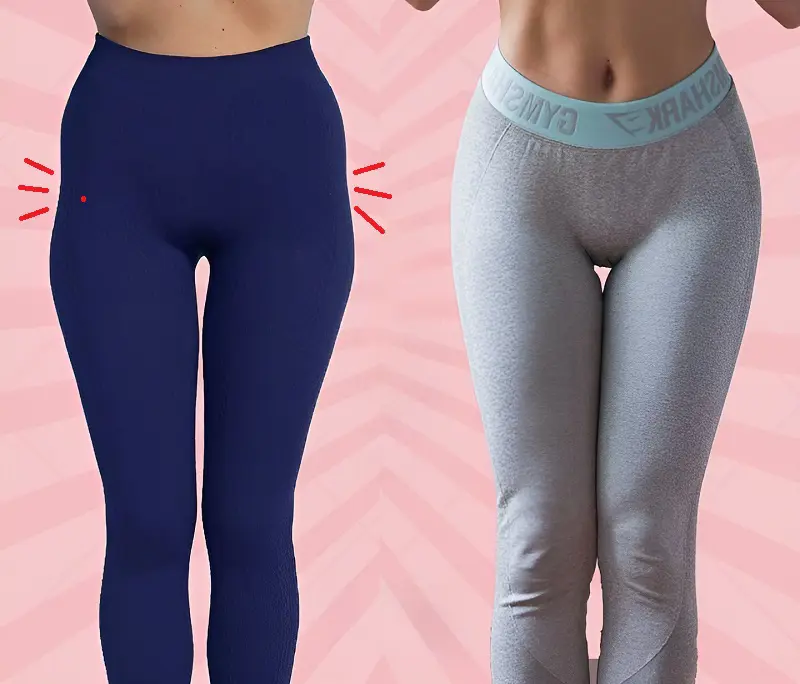
Hip dips are slight indentations on the outer hips, appearing as small inward curves when viewed from the front. They are usually due to the protrusion in the pelvic structure and are largely determined by genetics.
Many women aim for a more rounded hip shape, but these indentations can throw a wrench in those plans. While hip dips are natural and increasingly embraced, reducing their appearance may require consistent practice of a hip dips exercise. So, let’s look at the ways to get rid of them and how:
How To Get Rid Of Hip Dips?
Since hip dips are a result of the unique bone structure in pelvis, we can’t completely get rid of them. However, we can still work on filling up the indented area through building muscle mass.
Focus on good stretching exercises to strengthen and tone the hip muscles. Adding compound and isometric workouts can help make hip dips less noticeable and enhance your overall look.
Exercises To Reduce Hip Dips
1. Fire Hydrant
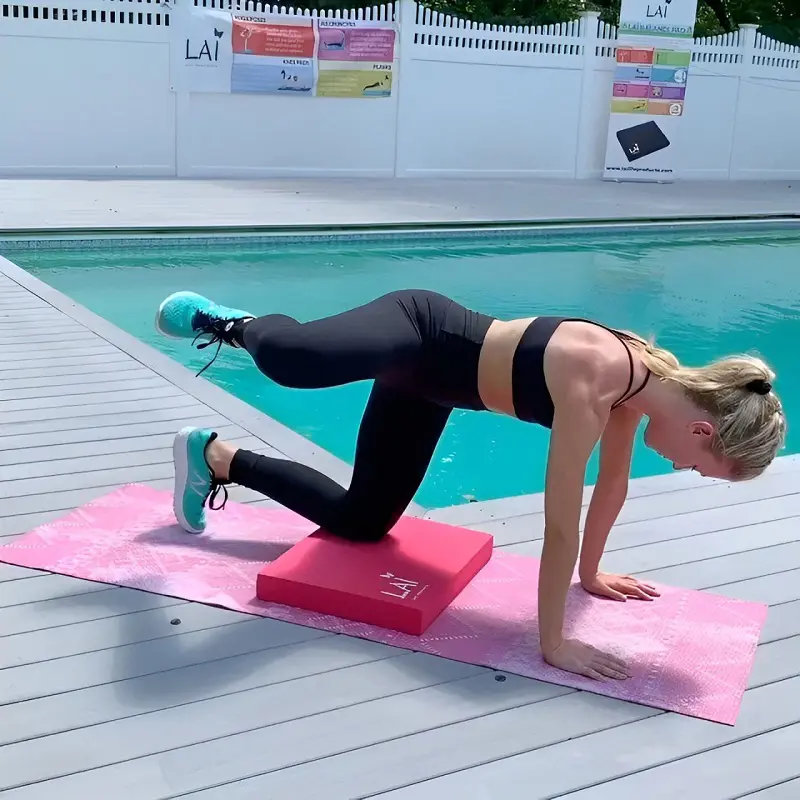
This hip dip exercise is great for toning our glutes, outer thighs, and core. By effectively stretching the gluteus maximus and hip adductors, fire hydrants can help reduce the appearance of hip dips over time.
To crank up the intensity, let’s try placing a dumbbell between our knees. With consistent practice, we may notice fat reduction within months.
Steps To Do It:
- Get into a table top position. The hands must be directly below the shoulders while the knees are under hips.
- Take a deep breath, then gently raise the left leg sideways with bent knees.
- Lift the leg till it becomes perpendicular to the right leg.
- Hold the position at the top for 5 seconds, keeping the left leg bent.
- Slowly lower the leg back down.
- Let the knee hover just above the floor before starting the next rep.
- Continue this process for 10 to 12 reps.
2. Squats
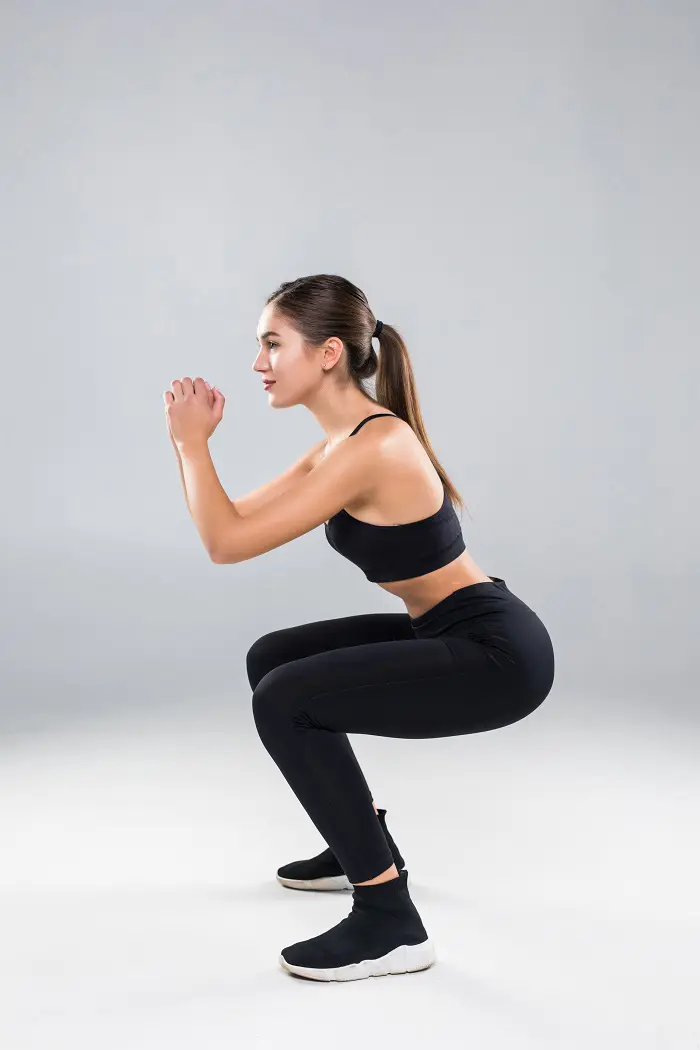
Squats are one of the top exercises for hip dips as they could help cover indentation by toning the hips, buttocks, and thigh muscles. They are famous in the fitness world and easy to do - just a small space at home is all we need.
Engaging our core is key while doing them. Want to level up? Throw on a resistance band around the thighs or grip a pair of dumbbells.
Steps To Do It:
- Stand with an upright posture. The shoulders should be relaxed.
- Clasp your hands together at the chest level. Keep the feet at hip width distance.
- Now, slowly descend by lowering the hips and bending the knees.
- Once the thighs become parallel to floor, stop the descent.
- Hold this pose for 30 seconds, then return to the standing position.
- Remember to keep the back straight during the entire process.
- Continue doing squats for desired number of reps.
3. Glute Bridge
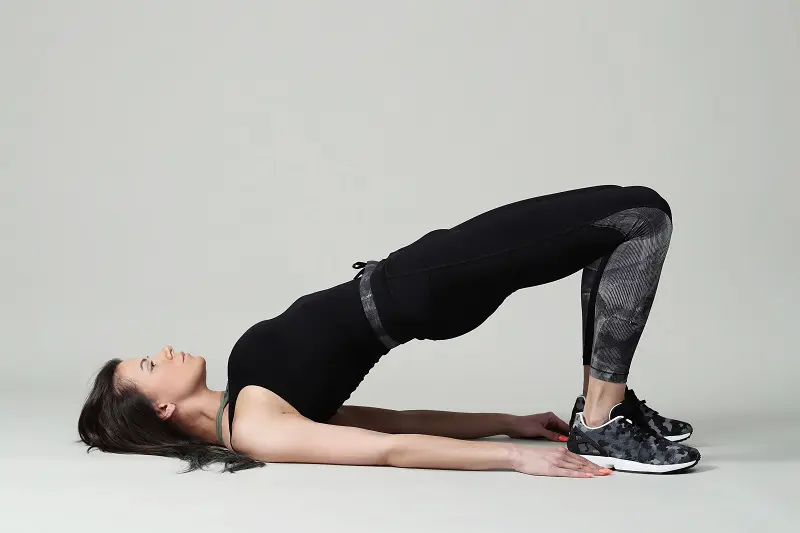
This is a great hip strengthening exercise for people of all age groups. It directly works the gluteus medius and gluteus maximus, contributing to the muscle build-up in the hip dips area.
Steps To Do It:
- Lie down on the floor with a straight back. Bent the knees and raise it off the floor.
- The arms must be located at your sides. The feet must be firmly planted to the ground.
- Press your palms and feet into the floor, then slowly lift your hips with controlled momentum.
- Raise them until your knees, hips, and back form a straight line.
- Hold at the top for a few seconds and squeeze your glutes while you're there.
- Bring the hips down and continue the same process for 10 to 12 reps.
4. Side Lunges
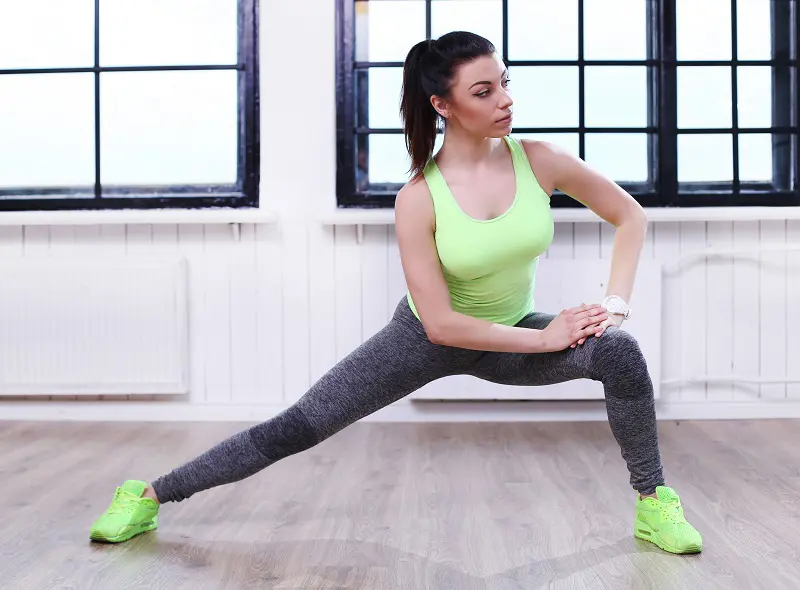
This workout stretches the entire lower body, targeting the hamstrings, quadriceps, and glutes. It is an excellent choice for giving a rounded look to the hips. We can also add a dumbbell while doing the side lunges to feel a deeper stretch.
Steps To Do It:
- Stand tall with the back flat and shoulders relaxed. Remember to keep the feet together.
- Take a wide step to your left with the left leg, lowering the body.
- Push your hips back as you step, keeping the back straight.
- Clasp your hands together at chest level while stepping.
- The right leg should become completely straight.
- Push through your left heels to bring the body back to the initial position.
- Switch sides and repeat the exercise for 10 reps.
5. Forward Lunge
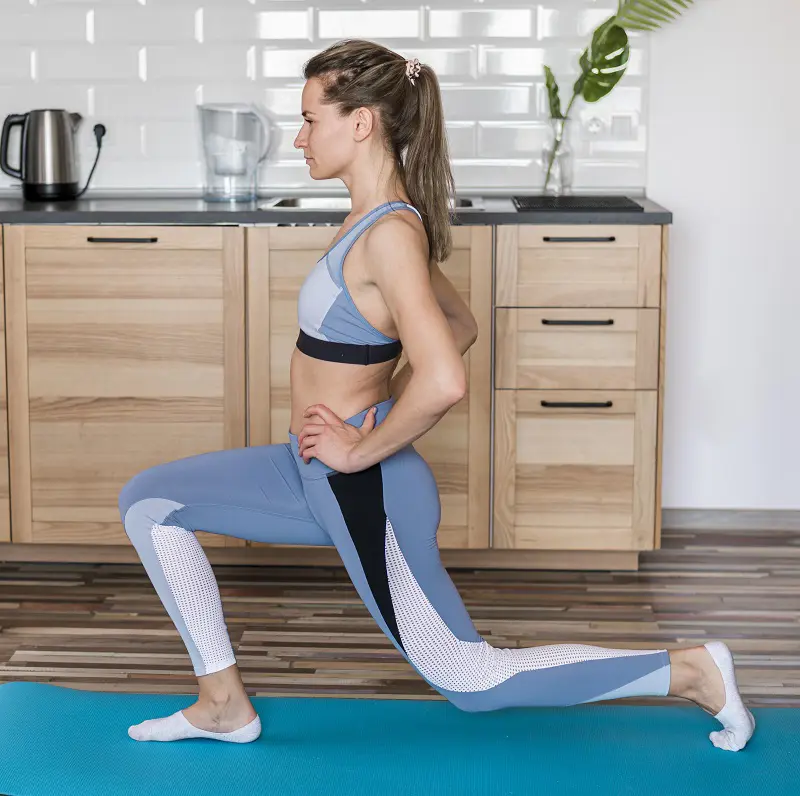
Just like the side lunge, a forward lunge can also work to build muscles around the hip dip area, giving a well-rounded look for your butt. Instead of stepping sideways, this move features taking a forward step.
Steps To Do It:
- Start by standing with a straightened back and feet placed together.
- Next, step forward with the right leg, lowering the hips in the process.
- Engage the core while stepping forward. Place your arms at the side for balance.
- Both knees should be bent once you take the forward step, with the back knee nearly touching the ground.
- Keep your front knee and toes aligned in a straight line.
- Stay in this pose for 30 seconds, then press through the front heels to stand back up.
- Practice the forward lunge for 10 to 12 reps.
6. Side-Lying Hip Abduction
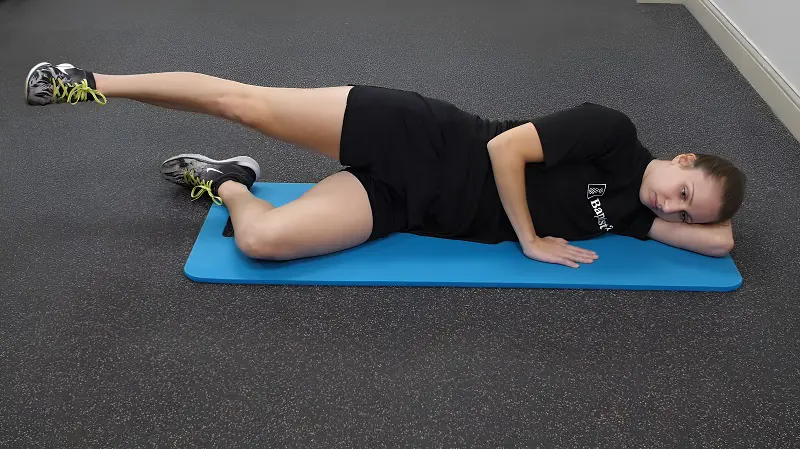
With this leg lift exercise, we can effectively target the glutes and strengthen the surrounding muscles. It's easy to practice at home, and by adding a resistance band, the leg lift becomes even more fun and challenging.
Steps To Do It:
- Lie down on the floor on your sides.
- The legs should be stacked on top of one another. The top leg must be straight while the bottom one can be bent.
- Keep your head supported with the hand or a pillow can also suffice.
- Raise the top leg slowly and steadily, without bending the knee.
- Go as high as possible. Stop once you start to feel discomfort or have to bend the knee.
- Bring the leg to the original position with controlled momentum.
- Perform this exercise for 7 to 10 reps, then switch sides.
7. Leg Kickbacks
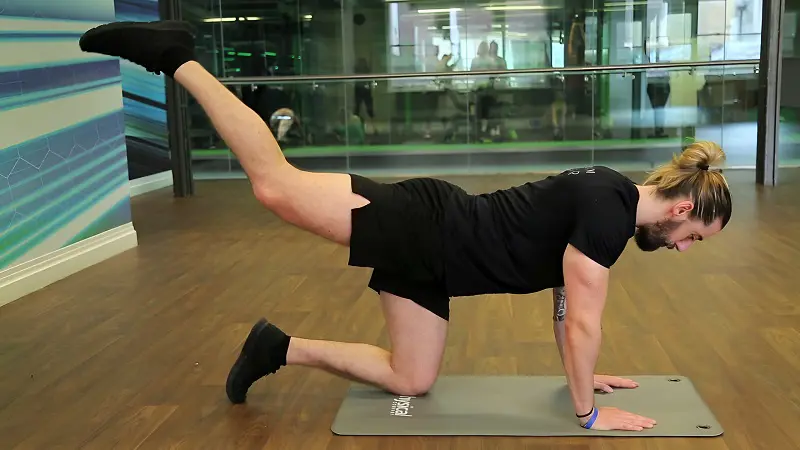
Leg kickbacks are great for lifting the butt, and can help create a toned look through smoothing out the contours of the hips. This exercise also targets the core muscles, enhancing posture and balance.
Customize this workout by adding ankle weights or a resistance band. Including them in your routine can have a positive effect on reducing the appearance of hip dips.
Steps To Do It:
- Roll a mat on the ground, and lay your palms and knees in a table top pose.
- Maintain a straight back, making sure your head isn’t raised.
- Now, raise the right leg backward. Extend the leg fully, feeling a stretch.
- Raise the extended leg as high as you can.
- Hold at the top for a few seconds, before lowering the leg down to the orginial tabletop position.
- Continue practicing this activity for 10 reps. Then, switch sides.
8. Clamshells
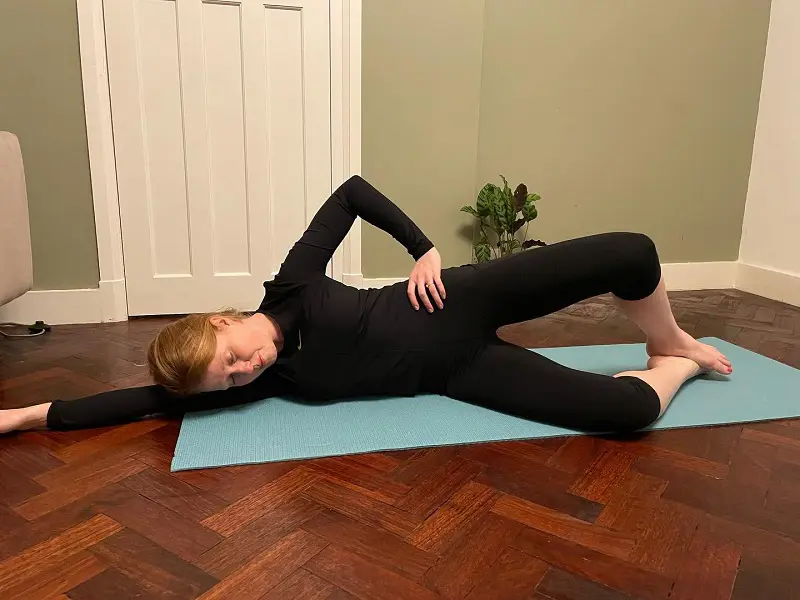
As the name suggests, this exercise mimics the opening of clam shells. Lifting the legs in a bent position creates this movement. Conduct this exercise regularly to feel the stretching and lengthening of the muscles around the hips. Within months, you may see a visible change in your curvy hip dips.
Step To Do It:
- Like the side-lying hip abduction, lay down on the floor on your side.
- Bend the knees and stack the feet on top of one another.
- Engage your core and start lifting the top leg, keeping the bend in the knee as you lift off.
- Reach as high as you can and stop at the top of the movement, creating an opening between the bent legs, similar to a clam shell.
- Stay in this pose for 5 seconds, breathing deeply.
- Next, bring the top leg back down to the ground.
- Continue this exercise for 10 to 12 reps, then switch sides.
9. Figure Four Stretch
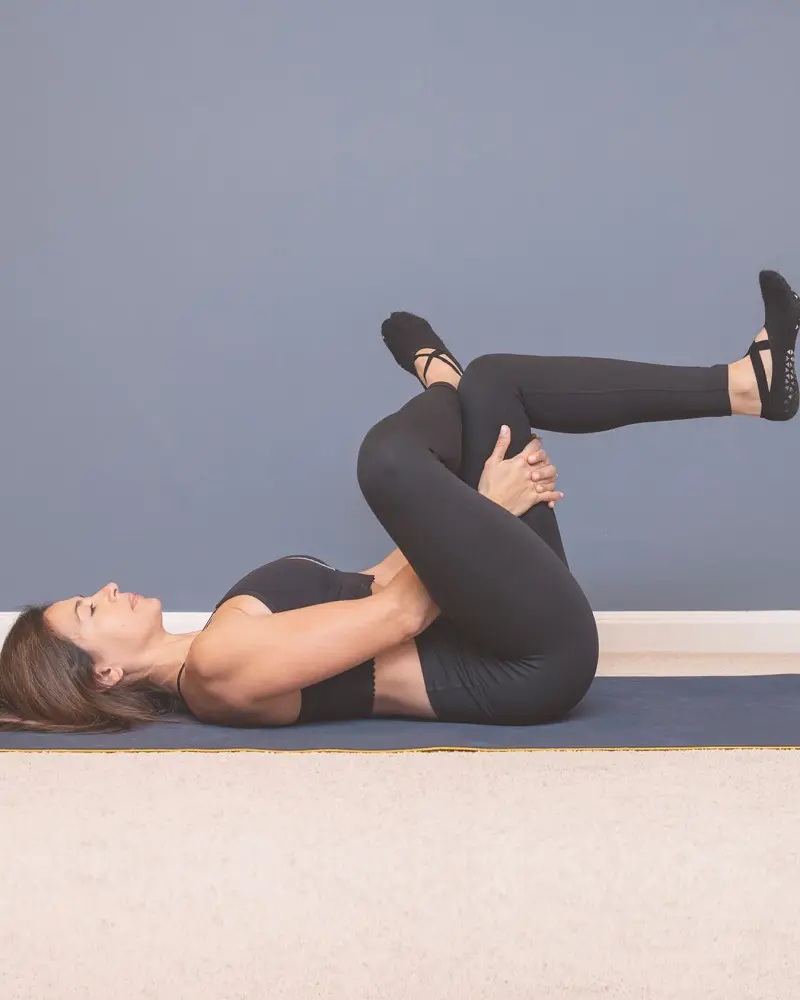
Primarily engaging the gluteus medius, this stretch helps promote better hip contouring. One of the finest hip dip workouts out there, it's also fantastic for improving range of motion and stability.
Moreover, the Figure four stretch targets the often hard-to-stretch piriformis muscle in the glutes too, making it an excellent piriformis stretch to try at home.
Steps To Do It:
- Lay down on the floor with the back flat. You can also do it while being seated on a chair.
- Bend both knees and then, cross the right ankle over your left knee. This creates the figure “4” shape.
- Grab your left thigh with both hands and press it toward your chest.
- Stay in this position for 30 seconds once you reach the maximum stretch.
- Bring the lower body back to the initial pose.
- Repeat this process for desired number of reps.
10. Glute Rainbows
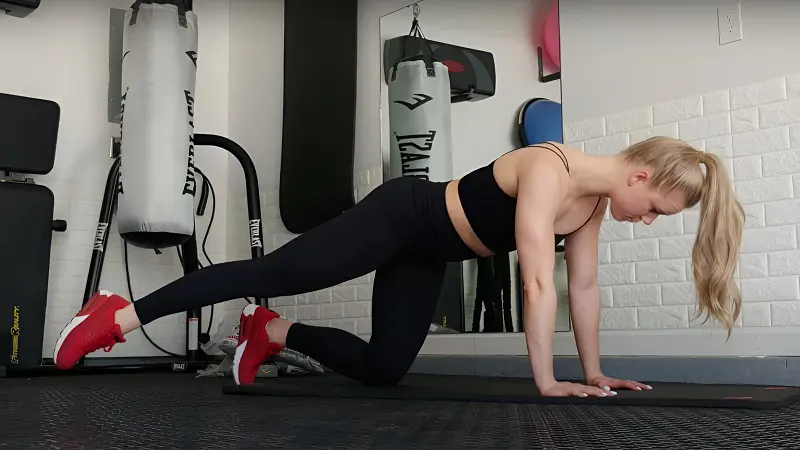
Glute rainbows can provide a fuller appearance around the hips when done consistently. It strengthens the gluteus medius and minimus, two muscles that are quite important for giving a rounded look.
This workout could also stabilize the muscles around the hip joint, which may make the transition between the hips and thighs smoother, reducing the appearance of hip dips.
Steps To Do It:
- Get down on all fours, with the knees under the hips and the palms under the shoulders.
- Now, raise the right leg slightly and extend it behind you.
- Inhale deeply, and start moving the extended leg in an arc-motion, also known as the rainbow motion.
- Sweep it across the left leg, bringing it back to the center, and then move it to the right side.
- Keep the other leg stationary, and your back straight throughout the entire process.
- Continue moving in an arc for 10 reps, then you should conduct the same move with the left leg.
What Causes A Hip Dip?
1. Pelvic Structure
This feature typically happens because of the shape of the ilium, the largest hip bone. If someone has a larger ilium, it can protrude more, creating an indentation in the outer part of the hips.
The second factor could be the longer distance between the ilium and the top of the femur.
2. Distribution Of Body Fat
Body fat distribution is also a cause of prominent hip dip structure. However, this is not exactly our fault, since we can never decide on where the fat gets stored in the body.
Some women may have more fat in their thighs and hips, which gives a fuller look and can help hide hip dips. However, others may have less fat, making the hip dips more noticeable to the eye.
3. Underdeveloped Glute Muscles
Underdeveloped gluteal muscles like the gluteus medius and minimus can make hip dips more prominent. Well-developed muscles, on the other hand, can reduce the indentations and give a more rounded appearance.
Are Hip Dips Normal?
Although they might seem concerning at first, hip dips are a completely normal part of your anatomy. They are not a determinant of being unhealthy or healthy. It is also fairly common, so you don’t have to fret if you see it on your body.
They do not impact your mobility as well. You can continue to move your hip joints with ease, even if the indentation is quite visible. They are unlikely to interfere with the hip joint’s function.
So, ladies, from a health perspective, hip dips aren’t something to stress about. Exercising to fill them out is purely for aesthetic reasons - to achieve a more rounded look at the hips.
Hip Dips Vs Love Handles
Love handles are just located above the hip dips, and are known as the fat accumulated at the sides of your waist. Unlike the hip dips, love handles are not associated with bone structure - it’s fully caused by fat distribution.
Both love handles and hip dips have something in common - they’re influenced by genetics and lifestyle. Along with knowing the exercises for hip dips, understanding how to lose love handles can complement both fitness goals at once.
Lifestyle Changes To Get Rid Of Hip Dips
Exercises alone cannot be the sole solution to getting rid of hip dips. We must follow a strict routine that encompasses balanced diet, good hydration, and proper rest to get measurable results.
Drinking water is crucial for maintaining the hydration level of the body. Poor hydraton could lead to loads of problems like fatigue, low blood pressure, muscle cramps, and rapid breathing. All these things can result in a bad workout session.
In terms of diet, healthy amounts of lean protein, carbs, and fibrous foods can lead to stronger development of muscles and keep us active for a long time. Remember, avoid junk and sugary foods if we desire a healthy body.
Disclaimer: The content presented in this article is only intended to be used for information purposes. It should not be taken as a form of medical / clinical advice.
Recent posts
How To
How To
How To Do Hip Thrusts: Methods, Benefits And Types
The hip thrust is a great bodyweight move for building strong glutes and a solid core. Also called the hip thruster, it’s great for improving posture and easing lower back pain. To get the most out of it, nailing the form is key. Everything fro...
How To
How To Do Bird Dog Exercise? Techniques, Types And Benefits
If we want to enhance core strength and spinal stability, Bird Dog is a fantastic bodyweight exercise to include in any workout routine. It activates various muscle groups like abdominals, glutes, and erector spinae. The movement itself isn’t t...
How To
How To Do Bicep Curls And Develop Stronger Arms
Bicep curl may be the first weight-training exercise we’ll learn during our fitness journey. Sure, it’s about moving a dumbbell up and down, but there’s more to it - it’s a solid strength builder and a great method to define t...
How To
How To Do Lat Pulldown? Methods, Benefits And Types
Doing a lat pulldown is not hard - it's all about maintaining proper momentum and pulling the bar toward our upper chest. This popular exercise is fantastic for engaging our back muscles, particularly the latissimus dorsi. Getting the form right is k...
How To
A Proper Guide On How To Do The Splits For Beginners
Learning how to do the splits is the ultimate goal for every gymnast and fitness enthusiast. Spreading the legs to a 180-degree angle is a true testament to athletic power and flexibility. As a beginner, it might feel intimidating at first, but with ...
How To
A Guide On How To Measure Your Waist Correctly
Measuring an individual’s waist is crucial for assessing internal fat deposits that surround the heart. It can indicate a person’s current health status, with a larger waistline suggesting a higher risk of heart disease and stroke. Along ...
